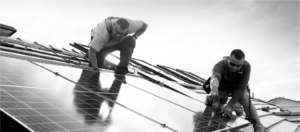
In my entire solar career, I’ve only installed rail mounted systems and had never been drawn to railless mounting solutions due to perceived complexity of the system. My impression was that the only benefit of railless systems are fewer parts for lower hard costs, which, in my mind, would have been offset by the extended installation time. After dusting off my work boots and helping install a SnapNrack railless system, I’m pleased to admit that I was entirely incorrect in regard to the complexity and speed of install.
After the required safety equipment was mounted, I started to help with chalking out the module layout, which was really no different than with railed systems. My questions for the crew began here, wanting a full understanding of the system in order to know where to land the SpeedSeal Tracks. My crew lead, Anthony, explained each row of feet is mounted at the horizontal meeting point of module rows and lands on a rafter*. Engineering on this roof called for 6’ horizontal spacing, not unlike most rail systems. Being the “rookie” on the roof, I was directed to line up the mounts and fill them with M1 sealant. The pilot holes were drilled by the time I finished and we began attaching the pre-filled feet.** Aside from the mounting location requiring a flashing due to a missed pilot hole, we had all the mounts installed in under five minutes.
The next step sets up the straight edge for the whole array, and this required a bit more attention to detail. The RL Universal Mount is attached to the bottom row of feet with a string line to ensure alignment. With the bottom row of Mounts secure, we started to install the skirt. This first row is the only row of Mounts that require Spacers, which allow the skirt height to match that of the module frames. Spacers are installed on the Mounts followed by the first section of the Skirt, ideally with the inside edge matching up with a vertical module seam. Two spacers are added to one SnapNrack Link assembly and the next Skirt section can be mounted. A best practice when installing this step recommends keeping constant upward pressure on the loose mount and downward pressure on the link.
After mounting the skirt along the full length of the arrays, the guys on the ground had prepared the modules with MLPEs frame mounts and wires secured. This may be the only part of the installation that is more difficult than a rail based system due to the lack of a rail channel for integrated wire management but with the right solutions and proper preparation this is well mitigated. The SolarEdge Power Optimizers were mounted to the underside lip of the module frame with wires secured so that the connectors were at the top two corners of the module, pointing outward, with the male and female on alternating sides depending on the direction the string was being wired.
Last came the final and most satisfying step, where I was truly sold on the railless system: slapping glass. The preceding steps definitely did feel like an improvement over traditional rail based systems but being able to single handedly mount an entire array of modules without feeling the risk of dropping a module was deeply satisfying. Instead of fighting gravity while aligning and securing the module on top of the rails, gravity comes in with the assist, holding the long edge of the module on the top lip of the bottom row of feet, with the only adjustments being made side to side. The next mount at the top edge of the module is either measured and mounted more precisely ahead of time, or adjusted and secured as the module is dropped in. One Link is needed between modules, which can be tightened before mounting the next row, eliminating the need to reach across modules.
All in all, I am now completely sold on SnapNrack’s RL Universal mounting system. There are significantly less materials, which provide both economical and ecological benefit, and the installation itself turns out to be far less complex and labor intensive than it may seem. The SnapNrack Configurator will even take the mental load off learning a new system for creating a Bill of Materials for your project. I highly recommend giving the system a test run and experiencing how much it can save in both hard and soft costs for your installations.
* DeckTrack may be mounted directly to the roof deck allowing for layout adjustability on the roof without the need to locate & attach to rafters.
** This install method requires special attention to time as M1 can “skin over” in as little as 15 minutes depending on temperature and humidity. Sealant absolutely should not be applied more than 5 minutes before installation.
—
Written by: Alex Pugh, AEE Solar Applications Engineer

